With Payment API, you can integrate a new payment method for Ecwid customers. It will be available as an online payment option on the checkout.
Required access scopes: add_payment_method, read_orders, update_orders
Read more about Access scopes
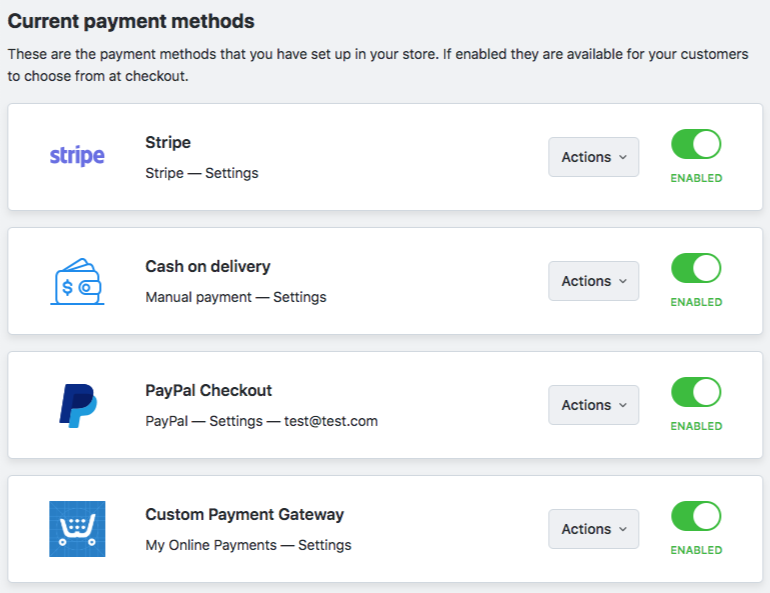
Example: Payments page in Ecwid admin where one custom option is added through Payment API:

Check out payment integrations available for your store in Ecwid admin
Payment gateway template
Get started quickly with a payment gateway template
How payment applications work in Ecwid stores
As a developer, you start from the App registration form in case of a public integration or custom app configuration if you build a private app.
For Ecwid users, the flow starts when they install and configure the payment option added by your app.
Step 1. Activating payment method
When your application has all the required settings for using Payment API, it automatically adds a new payment option to the Payments page in Ecwid admin:

When users install a payment application, Ecwid automatically creates and enables a new payment option in the store. After that, Ecwid redirects users to the app settings page so they can instantly configure it with their settings.
All enabled payment methods are available to customers on the checkout.
Step 2. Payment request processing
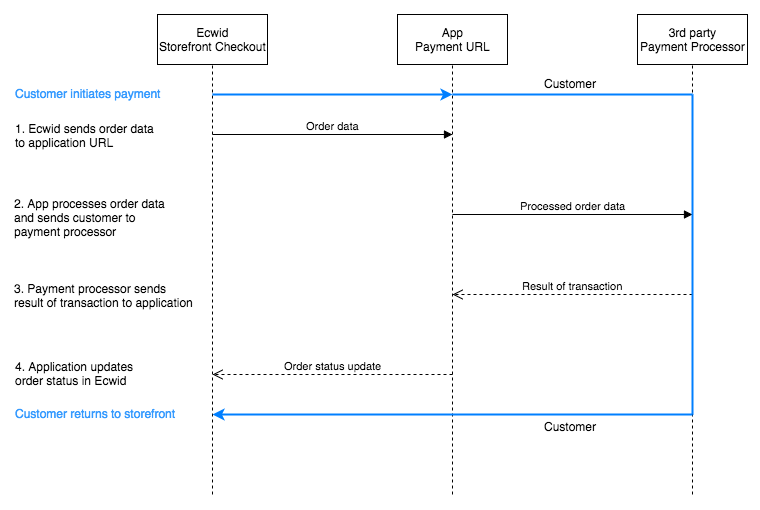
When a user selects the payment option on the checkout and clicks the "Go to payment" button, the following flow starts in the background:

Payment installation process
Merchants can add new payment methods from:
- Payment settings in the Ecwid Control Panel
- Search in the Ecwid App Market
Payment settings in the Ecwid Control Panel
Payment settings are located in Ecwid Control Panel > Settings > Payment. On that page merchants can edit existing payment methods and add new ones. If your payment application has been published in the Ecwid App Market and it's publicly available, merchants can find it in: Add new payment methods > Other ways to get paid > Choose payment processor.
Merchant will see your payment method in the drop down list depending on availability in their country. Make sure to specify the countries when submitting your app for review. The payment method name and logo will be used from your existing app settings.
Installation process in payment settings
When a merchant clicks on your payment method from the available list, Ecwid will automatically install your application into that store. Then, the payment method of your application will appear in the list of added payment methods in the payment settings of that store.
Search in the Ecwid App Market
Merchants can search for your payment method in the Ecwid App Market. If your app is published and is publicly available, it will appear in the search results.
Next, a merchant will click on your application and will be directed to your app details page. It will describe your integration in more details with screenshots.
Installation process in Ecwid App Market
To add a payment method from app details page, merchants will click the 'Install' button and the installation will be the same as any other application from the Ecwid App Market. As a result, a new payment method will appear among existing ones in the payment settings of merchant's Ecwid Control Panel.
Payment availability
The payment method added by your app works just like any other payment method added by a merchant.
It is possible to quickly enable/disable the payment method in a storefront right in the payment settings of the Ecwid Control Panel: find your payment method > switch the toggle to the disabled state. If you need to remove the payment method completely, go to: Ecwid Control Panel > Apps > My Apps and remove the app from the list.
